Importing transactions
If your bank is not supported by our provider or you just don't want to connect your account you can still import your transcations by hand.
You can import transactions into your account by clicking the Import button.
Import QFX or OFX files
If your bank exports QFX or OFX files, use them instead of CSV. This file format allows you to import the transactions without further configuration.
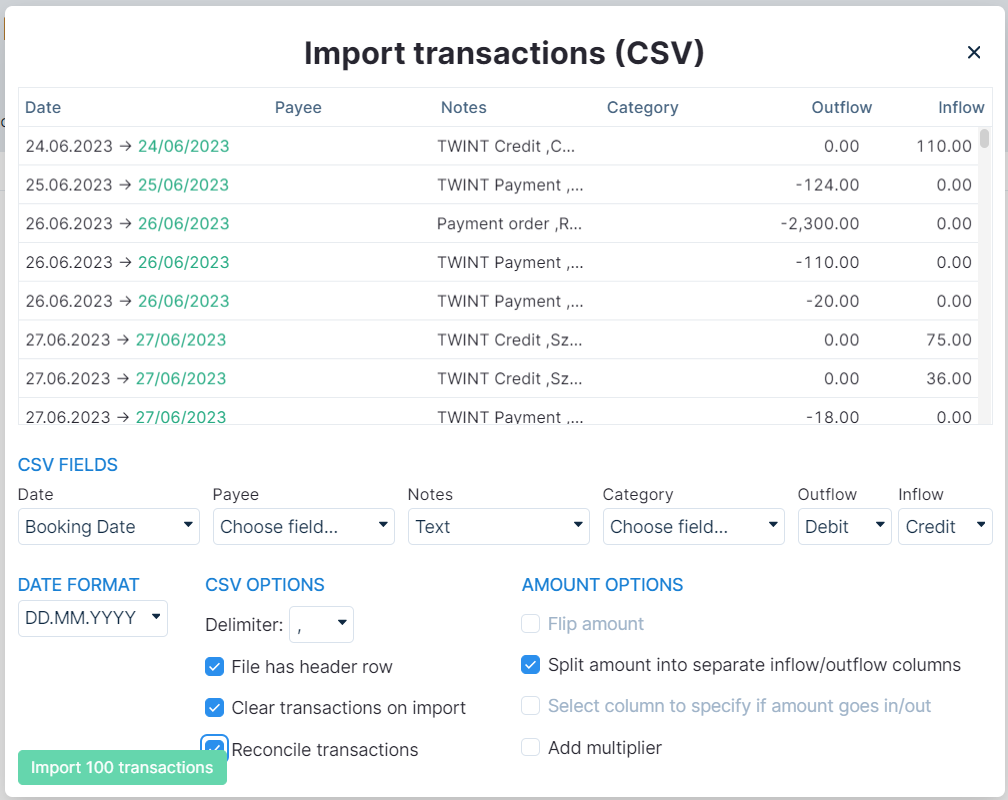
Import CSV files
If your bank doesn't support QFX/OFX files, you can import a CSV file instead.
Once you select the CSV button to import, you will see the following screen. This screen allows you to configure the format of your file, e.g. select the columns, set the date format, etc.
Manually add transactions
Last resort is to manually add your transactions.
You can do this by pressing Add in the corresponding account.
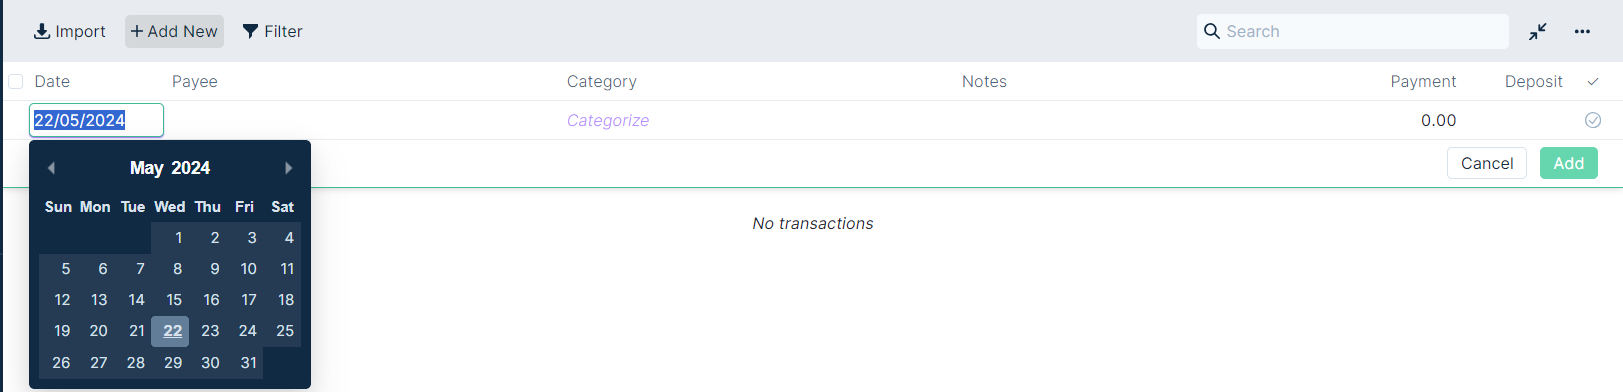
You will then have to fill the following fields:
- Date: When the transaction happened.
- Payee (optional): The counterpart of the transaction. Whom you paid or got money from.
- Category: Category of your budget in which this category falls.
- Notes (Optional): Some additional info that you might want to record.
- Payment/Deposit: The amout you paid or you got. If you receive money, it goes in the Deposit column.